Since my area of photography experience is very limited I've invited a some guest bloggers to contribute to this photo tip series with areas they excel in. A lot of people have expressed interest in indoor and food photography and I always admire Elizabeth of Delightfully Tacky's recipe and meal posts for her stunning pictures as much as they recipes themselves. Below are her tips for beautiful food photography.
Food photography is something that I've become more passionate about in the last couple years. I'd even venture to say that it's quickly become one of my favorite branches of photography, and no just because I get to chow down on whatever I just shot. For me, food photography is almost more about food styling than the act of clicking the shutter. Most of my food shoots are done in the same location with the same lighting set up, but it's the styling that makes them interesting. Unlike portraits, you can really control food photography very precisely and you can usually take as much time as you need to get the right shot, as long as you aren't shooting something that will quickly melt. There are a few basics to keep in mind when shooting food that will boost your food photos to the next level.
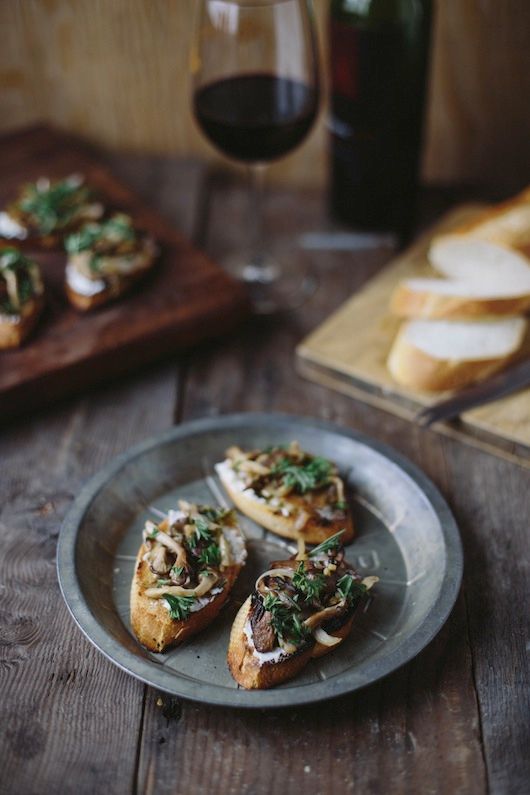
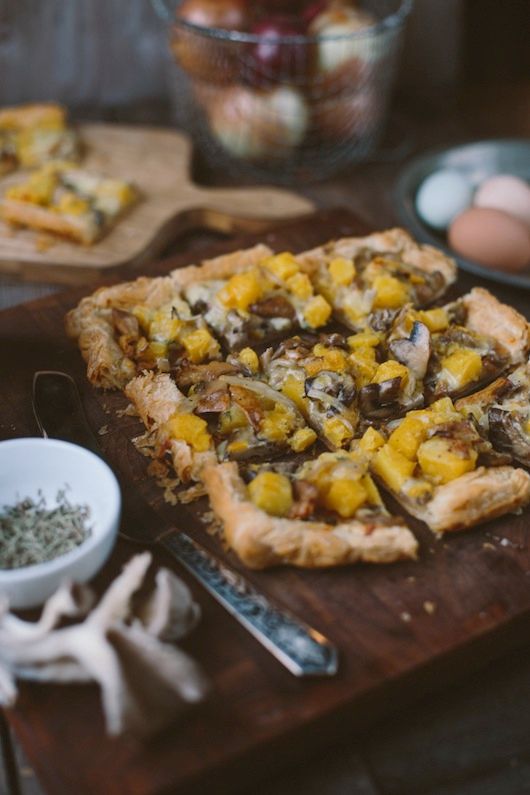
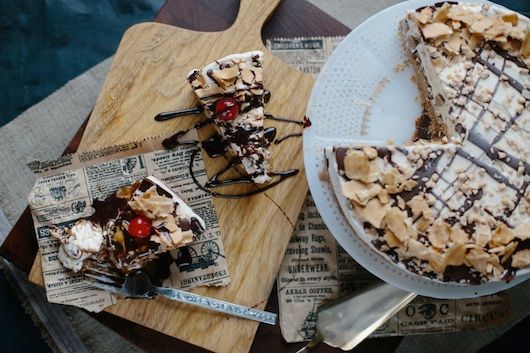
Unless you're experienced in shooting with off camera lighting set ups, I recommend shooting your food photos in daylight. Food looks awful under ambient light at night, no matter how good it tastes, so do your best to shoot during daylight hours. I even turn of all the lights in the kitchen when I'm shooting food so I don't get any weird light seeping in. This can be inconvenient if you want to shoot a dinner meal that you'd usually make at night, but you're just not going to get good photos if you shoot them with the lighting that already exists in your house. The top photos were shot indoors, at night, using the lights I had in my kitchen.
The bottom photos were shot during daytime using only natural light. They have relatively similar styling, but the photos themselves are drastically different.


My set up is super basic. I have a table right next to the window in our kitchen and I put a bounce card opposite from the window so I can bounce the sunlight back to the shadowed side of the food and fill in a bit where it might lose detail. My bounce card is just a sheet of foam core board with the plain white on one side and the other side covered with foil. This way I can choose how bright of a reflection I want. Sometimes all I need is the white side, sometimes I want more light filled in and I'll use the foil side.
Do whatever you can to shoot with natural light. I used to live in a house that was tiny and dark, so I'd shoot all my food on the front porch. I probably looked like a crazy person to my neighbors, but it gave me way better photos than I would've achieved doing them indoors.

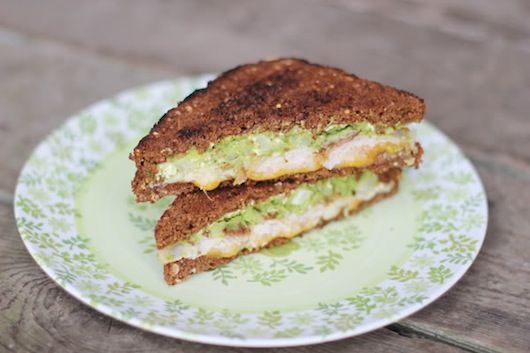
Depth of Field refers to how much of your photo is in focus. If you're shooting with an iPhone or point and shoot, you probably won't have much choice as to what your DOF will be, but with a DSLR you'll have options. I like to keep my DOF relatively shallow so that what I'm focusing on (the food, in this case) is in focus but the background is out of focus. I typically play between f/1.4 and f/2.2 for my food photos depending on how many things I want in focus. I use a 50mm f/1.4 lens for most of my food photos but occasionally I'll pull out my 90mm f/2.8 macro lens to get some fun detail shots.

One thing I'm learning more and more is that a garnish can really take your food photography to another level. A bowl of chili on it's own is okay, but if you put a dollop of sour cream on top, sprinkle some cheese and green onions, and add a dash of chili powder? You just made that photo so much more interesting and, bonus, mouthwatering. Basically what you're doing is creating visual interest. A bowl of chili alone is very monochromatic. It lacks interest, no matter how delicious your grandma's recipe is. A cocktail alone is nice, but a cocktail with a garnish is better. Think about color when you garnish, you want the garnish to give the food a pop, not blend in. Some food isn't naturally photogenic and needs more help, so garnishing is a perfect way to give it a little umph.
The left photo would've been much better if I'd included a garnish on the soup. The second photo shows a very similar looking soup, but the photo is so much more interesting because I garnished with some cheese, cilantro, and bacon!
A picture of spaghetti on a table alone is boring. You want to create images with their own story, and food photography is no different. Add a placemat that brings texture, but doesn't pull focus. Artfully swirl the spaghetti on a fork. Place a loaf of french bread in the background and cut a couple slices. Pour a glass of wine and put it next to the plate. You've just created a story and the photo is so much more interesting than the plain old plate of spaghetti you started with. Let's take a hint from this awful photo from one of my first food posts... boring and unappetizing!
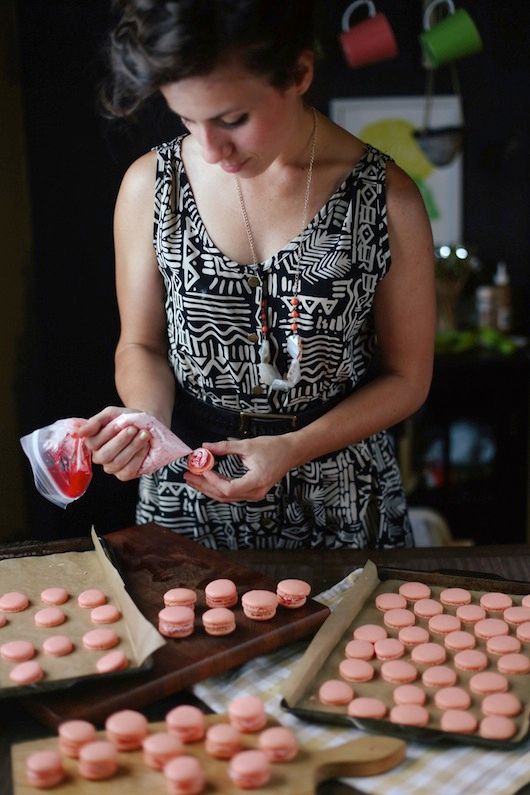
This isn't necessary, but it can produce some really interesting photos. If you're the photographer this can be more difficult as you'll have to document the process with a tripod and self timer, but if you have a helper or can document as someone else creates the food it will make it easier. Don't think that it's too hard to do on your own, I've done plenty of process shots on my own that have really enhanced a recipe post with just a tripod and self timer.

Process shots don't have to document the actual process either. Determine what parts of the process are most photogenic and focus on getting shots of those. I like to shoot pouring a cocktail from a shaker into the glass, but it can take a few shots to get all the elements right. Don't forget to style your process shots too. Create a scene that tells a story. Because you're using still photos, you only get that one moment to tell a story. In baking shots I'll usually have containers of my ingredients where they're measured out, even though I wouldn't do it that way if I was just baking normally.
This is easy to do by going to thrift stores and grabbing a few items that look good in photos. Maybe have a couple forks with a cool etched design on the handles, get some plain white plates that will highlight the food, grab bowls that look interesting to shoot soups. Even things like interesting cutting boards or napkins are great to have on hand to style your shoots. Something I learned is using smaller plates when shooting food than you would normally use for eating. A smaller plate is easier to fill and the proportions will look better on camera. It takes just a little bit more thought and effort to take a food photo from boring to mouthwatering. You don't need super fancy equipment to create delicious images. It takes some practice to start figuring things out, but you'll start to learn what looks good and what works. Practice makes perfect! Keep on shooting!
For more of Elizabeth's work check out her blog Delightfully Tacky.
Food photography is something that I've become more passionate about in the last couple years. I'd even venture to say that it's quickly become one of my favorite branches of photography, and no just because I get to chow down on whatever I just shot. For me, food photography is almost more about food styling than the act of clicking the shutter. Most of my food shoots are done in the same location with the same lighting set up, but it's the styling that makes them interesting. Unlike portraits, you can really control food photography very precisely and you can usually take as much time as you need to get the right shot, as long as you aren't shooting something that will quickly melt. There are a few basics to keep in mind when shooting food that will boost your food photos to the next level.
Shoot with natural light.
The bottom photos were shot during daytime using only natural light. They have relatively similar styling, but the photos themselves are drastically different.
My set up is super basic. I have a table right next to the window in our kitchen and I put a bounce card opposite from the window so I can bounce the sunlight back to the shadowed side of the food and fill in a bit where it might lose detail. My bounce card is just a sheet of foam core board with the plain white on one side and the other side covered with foil. This way I can choose how bright of a reflection I want. Sometimes all I need is the white side, sometimes I want more light filled in and I'll use the foil side.
Do whatever you can to shoot with natural light. I used to live in a house that was tiny and dark, so I'd shoot all my food on the front porch. I probably looked like a crazy person to my neighbors, but it gave me way better photos than I would've achieved doing them indoors.
Choose your DOF carefully.
Depth of Field refers to how much of your photo is in focus. If you're shooting with an iPhone or point and shoot, you probably won't have much choice as to what your DOF will be, but with a DSLR you'll have options. I like to keep my DOF relatively shallow so that what I'm focusing on (the food, in this case) is in focus but the background is out of focus. I typically play between f/1.4 and f/2.2 for my food photos depending on how many things I want in focus. I use a 50mm f/1.4 lens for most of my food photos but occasionally I'll pull out my 90mm f/2.8 macro lens to get some fun detail shots.
Garnish
One thing I'm learning more and more is that a garnish can really take your food photography to another level. A bowl of chili on it's own is okay, but if you put a dollop of sour cream on top, sprinkle some cheese and green onions, and add a dash of chili powder? You just made that photo so much more interesting and, bonus, mouthwatering. Basically what you're doing is creating visual interest. A bowl of chili alone is very monochromatic. It lacks interest, no matter how delicious your grandma's recipe is. A cocktail alone is nice, but a cocktail with a garnish is better. Think about color when you garnish, you want the garnish to give the food a pop, not blend in. Some food isn't naturally photogenic and needs more help, so garnishing is a perfect way to give it a little umph.
The left photo would've been much better if I'd included a garnish on the soup. The second photo shows a very similar looking soup, but the photo is so much more interesting because I garnished with some cheese, cilantro, and bacon!
Lay the scene.
A picture of spaghetti on a table alone is boring. You want to create images with their own story, and food photography is no different. Add a placemat that brings texture, but doesn't pull focus. Artfully swirl the spaghetti on a fork. Place a loaf of french bread in the background and cut a couple slices. Pour a glass of wine and put it next to the plate. You've just created a story and the photo is so much more interesting than the plain old plate of spaghetti you started with. Let's take a hint from this awful photo from one of my first food posts... boring and unappetizing!
Document the process
This isn't necessary, but it can produce some really interesting photos. If you're the photographer this can be more difficult as you'll have to document the process with a tripod and self timer, but if you have a helper or can document as someone else creates the food it will make it easier. Don't think that it's too hard to do on your own, I've done plenty of process shots on my own that have really enhanced a recipe post with just a tripod and self timer.
Process shots don't have to document the actual process either. Determine what parts of the process are most photogenic and focus on getting shots of those. I like to shoot pouring a cocktail from a shaker into the glass, but it can take a few shots to get all the elements right. Don't forget to style your process shots too. Create a scene that tells a story. Because you're using still photos, you only get that one moment to tell a story. In baking shots I'll usually have containers of my ingredients where they're measured out, even though I wouldn't do it that way if I was just baking normally.
Invest in interesting dishes, utensils, etc
This is easy to do by going to thrift stores and grabbing a few items that look good in photos. Maybe have a couple forks with a cool etched design on the handles, get some plain white plates that will highlight the food, grab bowls that look interesting to shoot soups. Even things like interesting cutting boards or napkins are great to have on hand to style your shoots. Something I learned is using smaller plates when shooting food than you would normally use for eating. A smaller plate is easier to fill and the proportions will look better on camera. It takes just a little bit more thought and effort to take a food photo from boring to mouthwatering. You don't need super fancy equipment to create delicious images. It takes some practice to start figuring things out, but you'll start to learn what looks good and what works. Practice makes perfect! Keep on shooting!
For more of Elizabeth's work check out her blog Delightfully Tacky.
0 comments:
Post a Comment